Many beginners often wonder, “How should I set my snowboard stance width and angles?”
If you’re unsure how to set them up, you might have just kept the settings that the shop staff put on when you bought your gear. If an experienced snowboarder at the shop set it up for you, there’s usually no issue. But sometimes, a staff member who has never snowboarded before may install your bindings — and in that case, the stance width or angle could be completely off, so it’s something to watch out for.
When you buy your board and bindings online, you’ll have to set everything up yourself, which can be confusing if you don’t know how to do it properly.
In fact, as an active instructor, I often get questions from students about stance width and angles — it’s one of the most common topics.
So in this article, we, as professional snowboard instructors, will explain in detail how to determine your ideal stance width and angles, recommend setups for different riding styles, and cover other useful binding adjustment methods.


- Stance & Angle — Unique to Snowboarding
- There’s No Single “Correct” Stance Width or Angle
- How to Determine Your Snowboard Stance Width
- How to Determine Your Snowboard Angles
- Recommended Angles for Freestyle / Ground Tricks (Gratri)
- Recommended Angles for Carving
- Recommended Angles for Powder
- Recommended Angles for Beginners
- When Your Boots Stick Out: What Is “Drag” and How to Fix It
- Adjusting Your Binding Centering
- Adjusting Setback
- Stance & Angles of Famous Riders
- Try Using a “Stancer”
- Summary
Stance & Angle — Unique to Snowboarding
Among sideways-standing sports like skateboarding, surfing, and snowboarding, the key difference with snowboarding is that your feet are fixed to the board using bindings.
Since skateboards and surfboards don’t have bindings, riders can freely change their stance width and foot angles depending on the situation. In contrast, snowboarding requires you to pre-set your stance width and angles.
Because your feet are fixed in place, once you get used to it, controlling the board becomes much easier. However, if your stance width or angles don’t suit your body, it can actually slow your progress — or worse, lead to knee or ankle injuries.
That’s why finding the right stance width and angles for your body and riding style is essential to improving safely and comfortably.
There’s No Single “Correct” Stance Width or Angle
As we mentioned earlier, having the right stance setup for yourself is important for improvement — but there’s no universal “correct” stance or angle.
The ideal settings vary depending on your height, body structure, and riding style.
Even if you find a stance that feels great now, making small adjustments later might make it feel even better. Instructors like us also experiment by changing our stance width and angles to fine-tune how we ride.
That said, there are some general guidelines you can start from. Adjust your stance based on these, then make small tweaks until you find what feels best for you — that’s your personal “correct” setup.
How to Determine Your Snowboard Stance Width
Let’s start with the basics of how to set your stance width.
If you’re wondering, “What exactly is stance width?” — it refers to the distance between the centers of your two bindings.
Adjusting your stance width affects how easily you can bend your knees, your stability, and your board control, so it’s important to find a width that feels comfortable for you.
Standard Reference for Stance Width
A common rule of thumb is that your stance width should roughly match your shoulder width. But since most people don’t know their exact shoulder width, you can use your height × 0.3 as a practical reference.
Example: 160 cm × 0.3 = 48 cm
This is just a guideline — you should ride with it and adjust if it feels off or depending on the style you want to pursue.
My height is 160 cm, and I usually ride with a 50 cm stance. I also change it slightly depending on the board length, so I recommend treating this just as a starting point and adjusting as needed.
To measure your stance width, simply measure the distance between the centers of both bindings.
Using the Recommended Stance to Check Balance
Once you’ve decided on a stance width based on the reference, the next step is to attach your bindings.
However, you might not know which screw holes on the board to use — those closer to the nose or the tail. Even if the stance width stays the same, moving your bindings forward or backward on the board drastically changes how it feels, so don’t just attach them randomly.
A good method is to start with the manufacturer’s recommended stance position, then make small adjustments from there.
If you shift both bindings the same number of screw holes forward or backward, your balance point won’t change. Place your bindings in the recommended stance position first, then widen or narrow them until you reach your desired stance width.
The recommended stance is the binding position that the board manufacturer considers optimal. Every board has marks indicating this, so check your board for those marks.
Since board length is usually proportional to your height, if you’re unsure about your stance width, starting with the recommended stance is perfectly fine.
Fine-Tuning Your Stance Based on Riding Style
While height provides a baseline for stance width, the ideal setup also varies depending on what kind of riding you want to do.
Here are some recommended stance widths for different styles — use them as a reference when finding your own setup.
• For Flat Tricks (Ground Tricks / Freestyle)
If you want to focus on buttering or ground tricks, go slightly wider than your standard stance width — roughly one screw hole wider.
Of course, the ideal width varies by person and by the tricks you want to perform, so it’s best to experiment until you find what works for you.
As a general rule, a wider stance makes butter tricks easier, while a narrower stance helps with popping ollies. Since it’s highly individual, try starting a bit wider than standard and fine-tune while riding.
• For Carving
If you want sharp, controlled carving turns, go slightly narrower than the standard stance width.
A narrower stance allows your board’s edges to grip the snow more effectively, maximizing edge control. However, it also makes balancing a bit harder, so avoid making it too narrow all at once — small adjustments are best.
• For Powder Riding
For powder snow, stick close to the recommended stance (height × 0.3).
A stance that’s too wide lowers your center of gravity, reducing float, while one that’s too narrow makes it harder to balance and may cause you to sink into deep snow.
Since riding powder is easier when your weight is slightly toward the tail, adding a setback (which we’ll explain later) is a good idea.
• For Beginners
For beginners, the recommended stance works best.
A wider stance increases stability but makes board control harder, while a narrower stance makes control easier but reduces stability.
If you’re finding that you’re not falling much but struggling to turn, try narrowing your stance slightly from the standard width to see if that helps.
How to Determine Your Snowboard Angles
Once you’ve set your stance width, the next step is deciding your angles — the degrees at which your bindings are positioned.
You can adjust the angles for the front and back bindings independently. Like stance width, the ideal angles vary from person to person and depend on your riding style.
Rather than sticking with one setup forever, it’s best to experiment and adjust as you improve.
Angles are surprisingly deep — I personally change them depending on whether I’m carving, riding park, or in powder. Even among carvers, preferences vary a lot, so it’s all about testing and finding what feels right for you.
So, What Difference Do Angles Make?
If you’re a beginner, you might wonder, “Are angles really that important?”
Understanding how angles affect your riding will help you visualize what you’re aiming for when adjusting your setup.
In general, the more your feet angle outward, the easier it becomes to rotate your body and initiate turns. That’s because a more open stance allows your upper body movements to translate more directly into board control.
There are two main stance types:
Forward stance: Both feet point in the same direction.
Duck stance: Feet point outward in opposite directions.
A forward stance makes initiating turns easier and gives strong pressure on the board, but it’s harder to ride switch (the opposite direction).
A duck stance, on the other hand, is great for riding switch and performing tricks that involve multiple directions. However, it provides less board pressure, making it less ideal for deep carving.
The best angle setup really depends on your riding style. Once you know what kind of riding you enjoy, you can fine-tune your angles to match it.
Regular or Goofy — Know Your Stance
Before adjusting your angles, determine whether you ride regular or goofy.
Regular stance: Left foot forward
Goofy stance: Right foot forward
If you’ve snowboarded before, you probably already know which one you are. If not, you can check out our article “Things to Know Before Your First Snowboarding Trip” to help you figure it out.
Recommended Angles by Riding Style
Now, let’s go over angle setups recommended for different riding styles.
These are just guidelines — your ideal angles might differ slightly. Use these as a reference, then adjust while riding to find what feels best for you.
Recommended Angles for Freestyle / Ground Tricks (Gratri)
If you mainly practice ground tricks or freestyle riding, a duck stance, where both feet point slightly outward, is recommended.
Specific angle examples that many riders find comfortable include:
Front foot +12°, back foot –9°
Front foot +9°, back foot –9°
Front foot +15°, back foot –12°
Start by trying one of these setups, then fine-tune gradually until you find the angles that feel most natural for you.
Recommended Angles for Carving
For carving, where pressing the board firmly is essential, a forward stance that allows you to apply force efficiently in the direction of travel works best.
Common angle ranges are:
Front foot +30° to +21°
Back foot +18° to +3°
Preferences vary widely among carvers — some ride with an extremely forward front foot, while others keep their back foot at 0°.
A forward stance makes carving easier and more powerful, but if you also like to ride switch, do tricks, or enjoy park features, avoid overly aggressive forward angles.
Recommended Angles for Powder
There’s no single “correct” angle for powder riding, but generally speaking, since powder doesn’t require strong edge engagement like carving does, and you may need to ride switch when doing tree runs, a duck stance or a 0° back foot is a good choice.
Try settings around:
Front foot +27° to +15°
Back foot 0° to –6°
Use these as a base and fine-tune according to your balance and preference.
Recommended Angles for Beginners
Most beginners haven’t yet decided which riding style they’ll pursue — or even whether they’re regular or goofy stance.
So, while you’re still getting used to snowboarding, a setup around front foot +15°, back foot 0° is recommended.
This makes it easier to practice turns, and if you later realize you’re actually the opposite stance (e.g., thought you were regular but you’re goofy), it’s easy to switch.
When Your Boots Stick Out: What Is “Drag” and How to Fix It
After setting your angles, you might notice that your boots stick out past the edge of your board.
When the boots touch the snow during a turn, it’s called “boot drag” — and it can cause you to catch an edge, lose balance, or fail to complete sharp carving turns.
Boot drag depends on your stance angles and boot size, but in general, having your toes and heels sticking out about 2 cm each is fine.
If they stick out more than that and you’re experiencing drag, try the following solutions.
★ How to Prevent Boot Drag
Adjust your binding centering and angles
Add riser plates to increase binding height
Switch to a wider board
Use bindings with higher heel cups that reduce contact with the snow
We’ll explain binding centering in detail below.
A riser plate is an item placed between your board and bindings to slightly raise the bindings and prevent boot drag.
Although it costs a bit, switching boards or bindings are also options.
That said, while a wider board will prevent drag, it can make sharp carving harder. Personally, I recommend keeping your current board and switching to bindings that reduce drag instead.
Pro Tip:
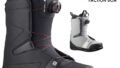
If you love precise carving but worry about drag, try the Salomon Hologram bindings.
Their heel cup design prevents the heel from touching the snow during backside turns, allowing smooth, powerful carves.
They also have the perfect medium flex, so they work great for both freestyle and park riding too.
Adjusting Your Binding Centering
Centering adjustment means moving your bindings slightly forward or backward on the board to align them evenly with the board’s width.
Usually, bindings are centered, but if your boots stick out and cause drag, you can shift the bindings slightly to prevent that.
To adjust centering, rotate the binding disc so that the screw slots are vertical — this lets you move the bindings forward or backward for fine-tuning.
Adjusting Setback
Setback means shifting your stance position slightly toward the tail of the board, moving your center of gravity backward.
Adding setback increases the length of the nose, giving you more float in powder and better stability in turns, making carving easier and smoother.
The downside is that it becomes harder to ride switch, but if you mainly enjoy carving or powder, adding setback is highly recommended.
However, if you’re a beginner, still unsure of your stance direction, or primarily doing freestyle/ground tricks, it’s best to avoid setback and keep your stance centered.
Stance & Angles of Famous Riders
Now that we’ve covered how to choose your stance and angles, let’s look at how some famous professional snowboarders set theirs up.
Matching the stance and angles of your favorite rider can be a fun way to experiment or learn from pros whose style you admire.
Pro riders often adjust their setups frequently depending on the event or snow conditions, so use these numbers as general references only.
| Rider | Discipline | Stance Width | Angles |
|---|---|---|---|
| Ayumu Hirano | Halfpipe | 52 cm | Front +15°, Back –6° |
| Kazuhiro Kokubo | Halfpipe / Backcountry | 55.8 cm | Front +21°, Back –15° |
| Taku Hiraoka | Halfpipe | 54 cm | Front +15°, Back –9° |
| Shaun White | Halfpipe | 58.4 cm | Front +12°, Back –3° |
| Yuki Kadono | Slopestyle | 52 cm | Front +9°, Back –9° |
| Kazunori Hirama | Carving | 60 cm | Front +36°, Back +27° |
| Kenichi Takizawa | Carving / Freestyle | 56 cm | Front +12°, Back –12° |
Try Using a “Stancer”
The best way to find your perfect setup is through trial and error — experimenting with different stance widths and angles until you find what feels right.
But if you’re not sure where to start, or if adjusting your setup over and over sounds tedious, you can use a Stancer.
A Stancer is a measurement system available at select snowboard shops. It analyzes your pelvis alignment and ankle flexibility to recommend the stance width and angles that best fit your body.
You can use it before setting up your board, or after experimenting with your own setup to see how close your settings are to your optimal numbers — it often leads to new discoveries about your riding style.
Summary
So, what do you think?
Snowboard setup might sound complicated at first, but once you understand the key points, even beginners can easily find the right stance and angles.
Trying different setups helps you discover what feels most comfortable for your body, and as you think more consciously about your positioning, your riding will naturally improve faster.
We are Samurai Snow Concierge, a private ski and snowboard school based in Rusutsu, Hokkaido, specializing in personalized instruction.
If you have any questions about snowboard setup or riding technique, feel free to reach out to us — our certified A-level instructors are always happy to help!


コメント