Once you start getting hooked on snowboard carving, many riders begin to feel curious about trying a hammerhead board.
You might have also seen someone on the slopes riding a board that looks noticeably more square than yours and wondered, “What kind of board is that?”
A hammerhead board is a snowboard designed specifically for carving. Its shape is optimized to make carving easier — but what exactly makes it different from a regular round board? And what are its pros and cons?
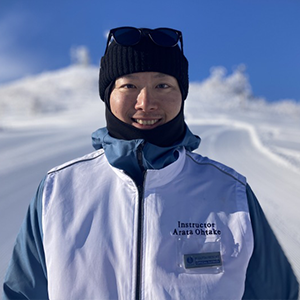
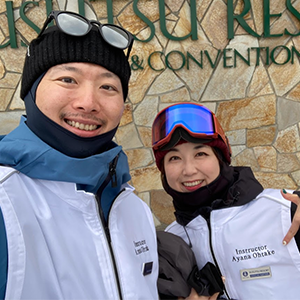
In this article, as certified A-level snowboard instructors, we’ll explain in detail the features, advantages, disadvantages, and how to choose the right hammerhead snowboard for you.
If you buy a hammerhead without understanding its characteristics, you may end up with a board that doesn’t match your riding style — and regret your purchase later.
Before you buy, let’s take a moment to understand what a hammerhead is and find the board that best suits your style.
What Is a Hammerhead?
Simply put, a hammerhead snowboard is one where the effective edge is maximized relative to the overall board length.
The effective edge refers to the portion of the snowboard’s edge that actually contacts the snow when laid flat.
When comparing a hammerhead and a round board of the same length, the hammerhead’s effective edge is significantly longer.
To achieve the same effective edge on a round board, you’d have to extend the board’s total length, which would make it heavier and harder to maneuver.
A round board typically has larger kicks (the upturned tips at the nose and tail), but hammerheads minimize the kick area to extend the effective edge as much as possible.
By shortening the nose and tail and reducing the kick, the hammerhead maximizes the effective edge and reduces swing weight, allowing for sharper, more precise carving than any round board of the same length.
Originally, hammerheads were designed for alpine riding, but nowadays, many freestyle models also feature hammerhead-style shapes.
Advantages and Disadvantages of a Hammerhead
For those who want to master carving, hammerheads might sound like a dream board — but they aren’t perfect.
Let’s take a closer look at the pros and cons.
➤ Advantages
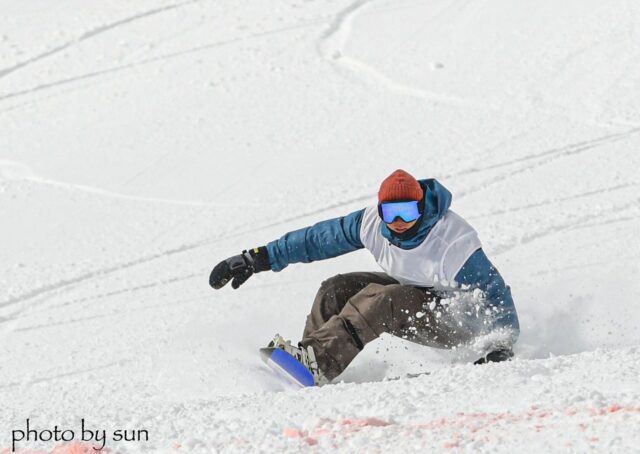
The biggest advantage of a hammerhead is its exceptionally sharp carving performance.
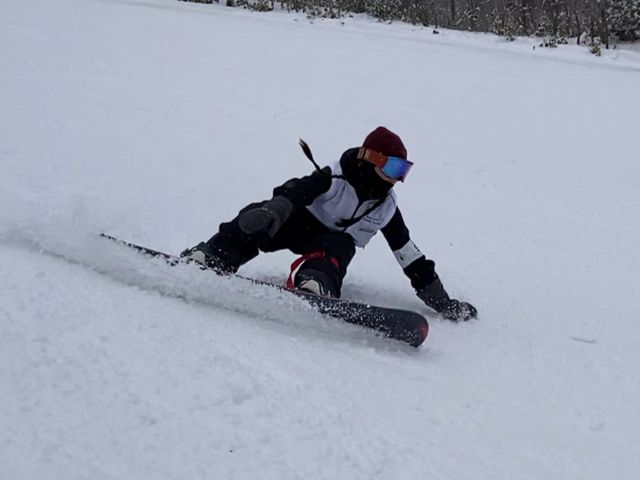
Thanks to the long effective edge, you can lean your body deep into turns with confidence and achieve that dynamic, high-speed carving style you’ve always admired.
Because transitions between turns are quick and snappy, you’ll feel more flow and speed in your riding.
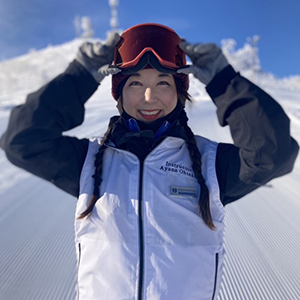
When I first rode a hammerhead, I was amazed — ‘I can switch edges this quickly?!’ I could lean my body much deeper into the snow with total stability and control. It honestly made advanced runs feel like beginner slopes because carving felt that effortless
➤ Disadvantages
As great as the hammerhead sounds, it does have some drawbacks:
The nose can catch depending on snow conditions.
It’s not ideal for powder or ground tricks (buttering, spinning, etc.).
It’s easier to catch an edge until you get used to it.
Round boards have longer, higher kicks, which help the nose stay afloat in deep powder.
However, since hammerheads have extremely short kicks, they struggle in soft snow or uneven terrain — the nose can easily dig in and cause you to fall.
Because of this, hammerheads aren’t suitable for enjoying powder snow, and since they’re generally stiffer and harder to handle, ground tricks become more difficult too.
Also, the long effective edge that makes it easier to grip the snow during turns can sometimes work against you — the edge might catch unexpectedly, leading to accidental edge catches (reverse edges) until you adapt to the board’s handling.
How to Ride a Hammerhead Smoothly
Once you’ve got a hammerhead, you’ll want to enjoy that exhilarating carving experience to the fullest.
To make the most of your board’s characteristics, keep the following points in mind when riding.
➤ Lean from your hips, not your head
This applies to carving in general, but especially on a hammerhead.
Many riders try to initiate a carve by tilting their head toward the snow — this is both dangerous and, frankly, uncool.
When you lead with your head, you lose your sense of balance and your weight doesn’t transfer properly to the board, increasing your risk of falling.
Even if you manage not to crash, you’ll waste the board’s true carving potential.
Instead, bring your hips closer to the snow, tilting your whole body naturally while maintaining balance and control.

Students often tell me, ‘I want to do those cool carves where my hand touches the snow!’ But if you try to reach for the snow, your head drops and your posture becomes unstable.
Instead of trying to touch the snow, think of it as your body naturally leaning so far that your hand just happens to touch it. Practice with that image in mind.
➤ Be mindful of your position and center of gravity
This also applies to any carving board, but positioning and balance are key to sharp, controlled turns.
To carve powerfully, you need to shift your weight smoothly throughout the turn.
Start by pressing firmly on your front foot to let the effective edge bite into the snow, then gradually transfer your weight to the back foot as you exit the turn.
This prevents sliding out and allows for a clean, connected carve.
Riders who stay on their front foot the whole time tend to get “stuck” — the edge remains buried and makes it hard to switch to the next turn quickly.
Remember, your position should always be shifting dynamically as you ride.

When practicing carving, always be aware of where your center of gravity is, which part of the board you’re pressing, and whether your stance allows for efficient weight transfer.
In lessons, we analyze each rider’s carving and give specific feedback on which positions or timing to adjust.
➤ Choose the right snow conditions for hammerheads
Unless you’re training for competitions or tests, the best way to enjoy a hammerhead is on carving-friendly slopes.
Hammerheads are highly sensitive to snow conditions — they can be your best friend or your worst enemy depending on the day.
For the best experience, ride on freshly groomed morning slopes or firm, packed snow.
Avoid soft spring snow or fresh powder days — the strong edge grip of the hammerhead can become a disadvantage, as the nose may dig in and cause a fall.

There’s nothing better than carving with a hammerhead on crisp, freshly groomed morning snow! But when it’s deep powder, switching to a powder board feels absolutely incredible.
For that reason, it’s often difficult to use a hammerhead as your one-quiver board for all conditions.
We recommend keeping it as a secondary board for carving days.
Tips for Choosing a Hammerhead Snowboard
Even though we simply call it a “hammerhead,” there are actually many variations, each with unique characteristics that greatly affect how the board rides.
Some people want to “go all out on carving,” while others might think, “I want to carve, but also do some ground tricks once in a while.” So, it’s important to choose a board that matches your preferred riding style.
Flex
Flex refers to how soft or stiff the board is. Just like with round boards, the flex has a big impact on how a board feels underfoot.
Soft flex – Easy to press and maneuver, great for hammerhead beginners, but lacks stability at high speeds.
Hard flex – Stable even on rough terrain and can handle high speeds, but difficult to control for beginners.
If it’s your first time riding a hammerhead board, a soft flex model is highly recommended. Even a soft-flex hammerhead can deliver plenty of carving performance.
Also, if you want to try not only carving but also buttering or ground tricks, a soft-flex hammerhead will be a great choice.
Sidecut
The sidecut refers to the curve along the edge of the snowboard. A deeper sidecut results in a smaller turning radius, while a shallower sidecut creates a larger turning radius.
With a deep sidecut, the board makes tighter, quicker turns, making it ideal for short turns and fast edge-to-edge movements. Conversely, a shallow sidecut allows you to draw out big, powerful arcs when carving.
It’s hard to compare sidecut values directly because they also depend on factors like board length and effective edge. However, since sidecut is a critical factor for carving boards, make sure to check it carefully when choosing your board.
Why is the sidecut so important for carving?
When carving, you tilt the board and flex it into the snow to turn. The sidecut comes into contact with the snow, guiding the board through the arc of the turn.
That means a deeper sidecut allows for more board flex, producing sharper, quicker turns—but it also increases resistance from the snow, which can make it harder to maintain speed.
On the other hand, a shallower sidecut creates less resistance, allowing for more speed, though it’s not as suitable for quick, tight turns.

If you’re taking certification tests or competing in carving events, where short turns are often required, you might want to go for a deeper sidecut board.
If you just want to enjoy free carving at your own pace, a shallower sidecut will give you a smoother and faster ride.
Length
When choosing the length of a hammerhead board, the basic rule is the same as with a standard round snowboard:
choose a board that’s roughly 15 cm shorter than your height.
However, if your main goal is short, quick carving turns, a slightly shorter board will be easier to handle.
If you prefer fast, large-radius carving turns, go for a longer board instead.
Also, the longer the overall board length, the longer the effective edge, so you can consider that balance when deciding what length works best for you.
Waist Width
When choosing a regular round board, most riders don’t think too much about waist width unless they have very large feet.
But if carving is your main focus, waist width is something you’ll definitely want to pay attention to—it affects how the board feels and performs.
A wider waist makes it easier to set the edge thanks to leverage, but it can also make edge changes slower.
A narrower waist, on the other hand, allows for quicker, sharper turns but makes edge engagement trickier.
It really comes down to personal preference, but I personally recommend starting with a wider waist.
For riders who are new to hammerheads, wider boards tend to be more forgiving and less likely to cause boot drag.

Many riders who struggle with carving—saying things like ‘my edge keeps slipping mid-turn’—are actually dealing with boot drag, not a skill issue.
It’s worth checking whether your board’s waist width might be the cause and trying a different width if necessary.
Metal or No Metal
Hammerhead boards stand out not only in shape but also in materials—specifically, whether or not they contain metal layers.
Most brands that make hammerheads offer both metal and non-metal versions of the same shape.
Non-metal boards are lighter and allow you to enjoy the board’s natural flex and rebound while carving.
They’re easier to ride on slightly soft or fresh snow since they don’t sink easily.
Metal-inlaid models, on the other hand, remain incredibly stable even on rough or bumpy slopes.
Even in the afternoon when the snow gets chopped up, these boards hold their line and let you power through uneven terrain with confidence.
They perform best on firm, groomed snow during the peak season—in those perfect carving conditions, the smoothness and power you feel are unbeatable.

For advanced carvers who want more power and stability, a metal-inlaid board is the way to go.
But for carving beginners or first-time hammerhead riders, a non-metal version is easier to get used to and more forgiving.
Try Before You Buy
We’ve covered the main points for choosing a hammerhead, but because hammerheads feel so different from round boards,
the best way to find your perfect board is to test-ride it first.
Demo events are often held by shops or brands.
If you ever see a chance to test a hammerhead at one of these events, definitely take it!
That said, it’s quite rare to “accidentally” come across a hammerhead demo at a ski resort,
so we highly recommend checking where and when demo events are being held before heading to the slopes.
Our Top 4 Recommended Hammerheads
Now that you understand the key points of selection, here are four recommended hammerhead models.
Each has its own unique charm, so try to find the one that best matches your style.
MOSS — TWISTER
First up is the TWISTER from MOSS, one of Japan’s most respected and long-standing snowboard brands.
The TWISTER’s defining feature is its outstanding stability at high speeds.
Once you learn to handle it, you can transition between turns with almost no speed loss thanks to its powerful base and construction.
It responds effortlessly—you just press lightly, and the board automatically initiates the next turn.
Because it resists skidding and maintains momentum, it’s perfect for mid to long carving turns with power and flow.
Its flex pattern also makes it fairly accessible, even for riders trying a hammerhead for the first time.
The only downside is the price—it’s on the expensive side—but the quality is guaranteed.
If you’re serious about mastering carving and looking for a hammerhead to commit to, the TWISTER is an excellent choice.
YONEX — THRUST
Next is THRUST from YONEX, a world-class Japanese brand known for its cutting-edge technology.
Made with YONEX’s signature carbon construction, this board has about 2.4 times more vibration absorption than normal boards,
allowing smooth, stable carving from soft snow to icy hardpack.
The THRUST features a variable “Easy Ride Camber”, giving you strong edge grip at turn initiation and effortless release at the end—
a dream combination for anyone chasing perfect turns.
The nose and tail are also lightweight, making it easy to execute short turns with agility.
BC Stream — R-2
The R-2 from BC Stream, famously ridden by professional rider Kazunori “Rama” Hirama,
is another fantastic hammerhead option.
It combines the long effective edge typical of hammerheads with a supple flex that makes it surprisingly easy to control.
Thanks to a latex sheet that absorbs vibrations, it delivers both smooth maneuverability and high stability.
The R-2 was BC Stream’s first model to feature variable camber, designed to prevent excessive edge bite on the snow while maintaining exceptional hold and rebound.
This makes it a very versatile and responsive carving board.
GRAY — DESPERADO
Finally, we have the DESPERADO from GRAY, one of the most popular hammerheads in Japan.
You’ll almost always spot someone riding a GRAY hammerhead on the slopes—it’s loved by everyone from carving beginners to advanced riders.
The DESPERADO is built to eliminate the nose-catching problem common to many hammerheads,
making it easier for first-time riders to carve aggressively right from the start.
It also has a well-designed kick, allowing for stable carving even on soft or rough snow, without getting thrown off by surface bumps.
Is Riding a Hammerhead “Cheating” in Carving?
Some experienced carvers claim that using a hammerhead for carving is unfair.
The reason behind this view is that hammerheads make it too easy to switch edges and execute sharp turns,
which some argue takes away from the “pure” carving skill.
That’s why you might hear comments like:
“You won’t actually improve your carving skills on a hammerhead.”
“It’s cheating.”
“Carving on a hammerhead doesn’t count as real skill.”
But opinions on this “hammerhead debate” vary widely, and there’s no absolute right or wrong answer.
Personally, I believe that riding a hammerhead is perfectly valid for anyone who truly wants to master carving.
Think about it: freestyle riders choose twin-tip boards that make spins and presses easier.
Powder lovers choose directional boards with pointed noses for better float.
So why shouldn’t carving enthusiasts choose hammerheads designed specifically for carving performance?
If someone said, “I can’t do butter tricks well on this long, stiff, heavy board,”
most people would tell them, “Then get a different board.”
Snowboarding is a sport where equipment matters.
Using the best board for your style and conditions isn’t cheating—it’s smart.
And it’s not like hammerheads carve for you.
You still need to learn how to handle them properly, refine your technique, and develop the skills to bring out their full potential.
It’s like saying Shohei Ohtani’s home runs don’t count because he uses a high-quality bat—no one would ever think that.
What really matters is whether you’re choosing a board that fits your riding goals—
and whether you’re using its strengths to the fullest through your own technique.
Summary
In this article, we’ve explored the features, pros and cons, and selection tips for hammerhead snowboards.
Did you find it helpful?
As mentioned in the final section, there’s nothing wrong with riding a hammerhead.
If you’re passionate about improving your carving, you should definitely try one for yourself and experience the difference.
Whether you aim to master carving completely, mix in freestyle tricks, or focus on short, dynamic turns—
the key is to choose the board that best matches your goals.
We are Samurai Snow Concierge, a private ski and snowboard school based in Rusutsu, Hokkaido.
If you ever need advice on choosing the right board, carving techniques, or are struggling with improving your carving,
feel free to reach out to us—our certified A-level instructors are always happy to help!


コメント